Replacing Rear Shock Mounts
- Model & Year: 92-98 3-Series
- Expertise: Beginner
- Date: January 29, 2004
- Updated: October 25, 2014
- Time Estimate: 3 hours
Tools Required
- 13 mm, 18 mm socket
- 5/8 crescent wrench
- Adjustable wrench
- Right-angle phillips screwdriver
- Bench vice (optional)
- Torque wrench
Facilities Needed
- Garage (or solid surface)
Parts Required
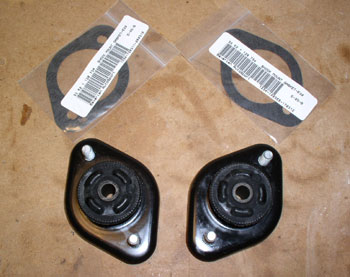
- (2) Rear Shock Mounts from E46 Convertible, p/n 33 52 6 779 670, $48.50 retail
- (2) Rear Shock Mount Gaskets, p/n 33 52 6 772 864, $1.53 retail
Getting Started
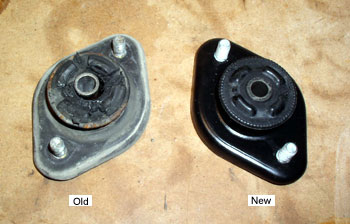
Are there rattling noises coming from your trunk over rough roads? Does your trunk make strange clattering sounds? You probably have failed rear shock mounts - an easy DIY item. Mine failed at around 110K miles and looked terrible when removed. The center metal shaft had completely separated from the surrounding rubber mount (see image below).
For reasons unknown, the E46 convertible shock mounts are reputed to be better than stock E36 mounts - and cheaper (p/n above). You'll need two new gaskets as well (p/n above).
Procedure
1) Remove rear speakers. A right-angle phillips screwdriver comes in handy here.
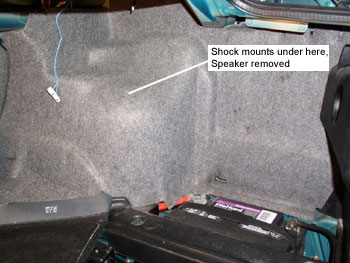
2) Peel back trunk liner all the way to expose shock mounts. You may have to remove the taillight cover inside trunk to allow liner to come out. Hang op-light over trunk gasket for convenient lighting
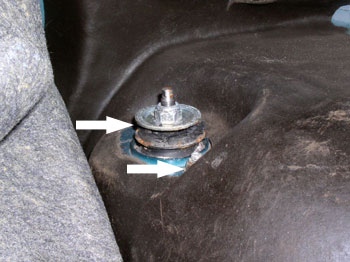
3) Using 13 mm socket, remove the two upper mounting nuts. See image below (rubber protective cap removed).
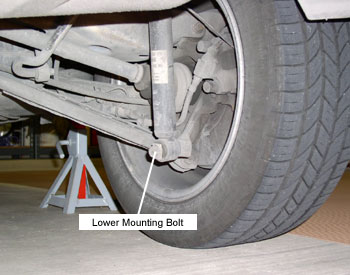
4) Using your jack, raise rear of car to gain access to the lower shock area, but leave rear tire lightly in contact with the ground. Use a jack stand provide stable support. DO NOT rely on jack alone. You'll need stability to remove that lower mounting bolt.
5) Release lower mounting bolt with 18mm socket, or you may substitute 3/4" standard socket. It's on tight (a breaker bar may help). See image below.
6) Allow shock to fall into your hand and remove it by lowering it out from the bottom. You may compress the shock to gain extra room for movement.
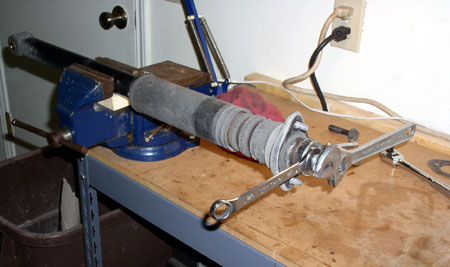
7) Move shock assembly to bench vise or other suitable tool to hold. Using an adjustable wrench on the outermost end of the shock to prevent it rotating, use a 5/8 open-end wrench to remove the upper mounting nut. See image below.
8) Remove old shock mount with its gasket and cupped washers. Inspect shock for oil leakage and clean parts.
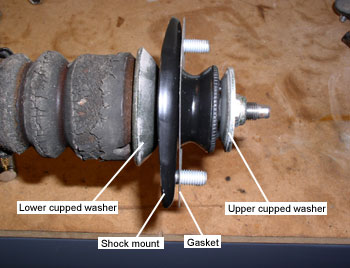
9) Install new parts, making sure of cupped washer orientation. Install larger cupped washer first (cups toward lower mounting bolt), then shock mount with gasket, then smaller cupped washer (cups toward upper mounting nuts). See image below.
10) Install new shock assembly in reverse order. Tighten lower mounting bolt to 77 Nm (57 ft-lb). See Bentley service manual page 330-4 for other torque specs or just use a solid "snug" feel. Don't forget to pull rubber protective cap completely over upper shock mount once it's back in.
Now, enjoy a noise-free drive!