Headlight Replacement or Upgrade
- Model & Year: 92-98 3-Series, U.S.
- Expertise: Intermediate
- Date: September 12, 2004
- Updated:
- Time Estimate: 3 hours
Tools Required
- 8 mm socket
- Ratchet with extension bar
- Phillips screwdriver
- Flashlight
- Other basic hand tools
Facilities Needed
- Garage or level surface
Parts Required
- Stock Headlight Lenses
- p/n 63-12-1-387-863 (L), $125.15 list
- p/n 63-12-1-387-864 (R), $125.15 list
- or aftermarket projector lenses, with or without "Angel Eyes"
- From $400 - $700/pair, depending on type
Getting Started
Want to replace your old, ugly, foggy headlight lenses? There are many confusing choices.
First, I have found that solutions which promise to polish out foggy lenses don't work. The only real solution is replacement.
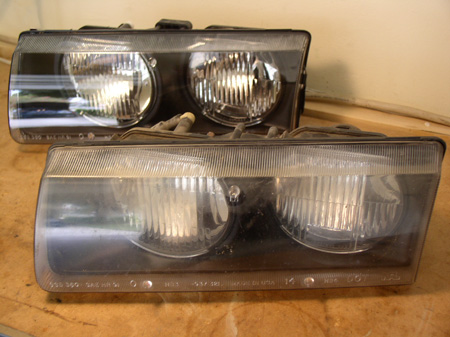
If you're mostly happy with your stock lighting, replace the whole headlight lens assembly (sold as a complete module, p/n above). This is the easiest, most affordable way to go. Many discount dealers offer good prices ( I purchased mine for $82.40 each). See comparison image below.
Once replaced, consider protecting your new lights with adhesive strips, sold thru places like Bavarian Autosport.
If you want to "upgrade", there are several Euro-type kits available which project and focus the light through glass lens assemblies. Some have trendy "Angel Eye" light rings around the lens circumference. But there are several things to consider:
- None of these kits are US street legal. The Feds say the focused beam pattern is too high and blinding to on-coming traffic. Although I doubt you'll get called on it, the issue is there.
- The glass lenses can crack or break. The glass is replaceable but cost and availability can be an issue.
- All kits require wiring adaptors. None are "plug-n-play" and require additional wiring.
- Price. Kits with "Angel Eyes" range to $700/pair. Good ZKW kits with wiring are about $450/pair. And bulbs, which may not be included, cost up to $85/pair (you'll need two pair).
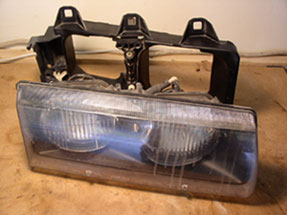
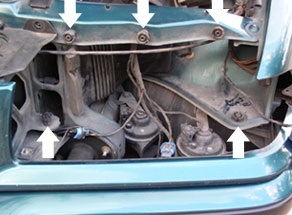
The headlight assembly consists of two parts: 1) the lens module and, 2) the carrier frame. See image below left. The frame must be removed before the lens module can be separated and replaced. The frame mounts to the chassis in five locations. See image below right.
NOTE: The following procedure applies to stock replacement. For those "upgrading", the removal steps are still applicable.
Procedure
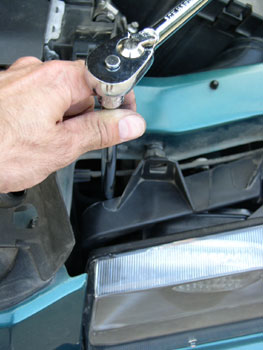
1) Using 8 mm socket, remove the three upper mounting screws above the lens. Use a screwdriver (or a crescent wrench) to hold the plastic adjuster nuts stationary while you turn out the screws, so as to maintain the original headlight aiming. See image below.
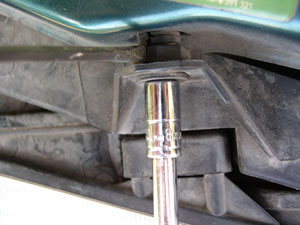
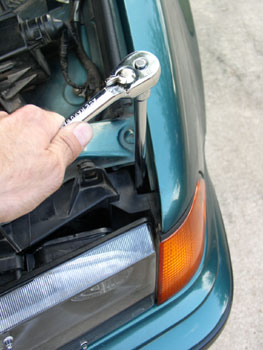
2) Using an extension bar, remove the remaining left and right 8mm screws, located behind the lens. You'll need a flashlight to see 'em. See images below.
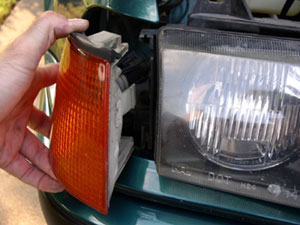
3) Pull headlight assembly outward carefully. Disconnect the two light bulb plugs and slide the turn signal off the carrier frame. See image below. Move light assembly to workbench.
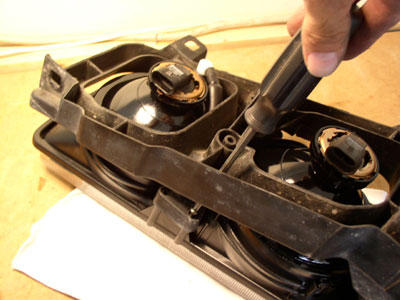
4) On backside of light assembly, locate the four center lens mounting screws through the access holes in the carrier frame and remove. See image below left. Locate the two other mounting screws and remove. See image below right.


5) Pull lens out of carrier frame and remove bulbs. Insert bulbs in new lens and install new lens in reverse order. Tighten mounting screws completely, being careful not to disturb aiming adjustment screws on carrier frame. See image below.
6) Finish installation of new assembly in reverse order. When complete, verify headlight aim and function. I used my closed garage door to project light onto. Consider protective lens covers on your new investment, too.
Enjoy!