Center Cup & Coin Holder
- Model & Year: 91-97 8-Series
- Expertise: Beginner
- Date: June 14, 2008
- Updated: July 2008
- Time Estimate: 5-7 hours
Tools Required
- Phillips screwdriver
- Hand-held drill with associated bits
- Sabre saw or other suitable cutting tool
- Radius file and fine grit sand paper
- Other basic hand tools
Facilities Needed
- Work bench
Parts Required
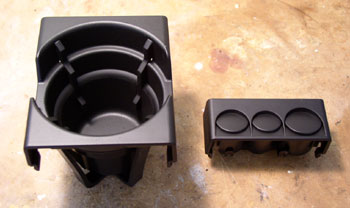
- (1) BMW cup holder, p/n 51 16 8 217 480, $17.30 list
- (1) BMW coin holder, p/n 51 16 8 217 481, $30.69 list
- (6) small, 1/2" flathead screws
Getting Started
I have searched the Web for cup holder solutions for my 8'er but was never happy with the choices. What I wanted was to replace the dated and next-to-useless ashtray with a cup holder of some kind. Since I couldn't find an off-the-shelf solution, I made one.
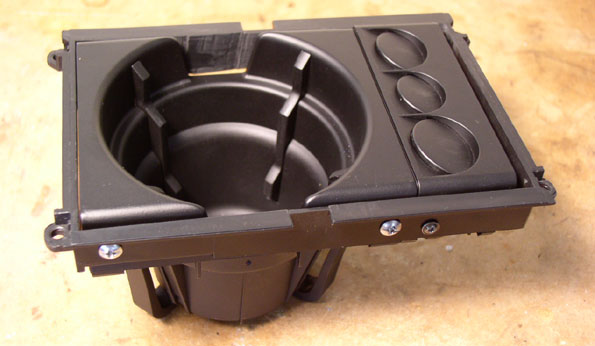
Initially I was hoping to install two cup holders but found that only one fits in the old ashtray space. A coin holder nicely fills out most - but not all - of the remaining space (even though it does duplicate the stock in-door coin holder). I had to use a strip of black leather to overlap the front of the coin holder and fill the leftover 1/4" gap.
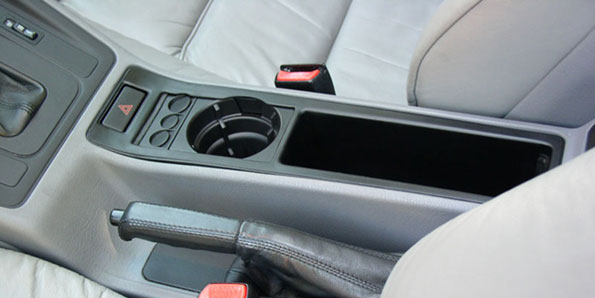
In this procedure the old ashtray is cut away leaving its upper frame as a mounting surface for the new parts. The old frame (with the new parts) then mounts back into the same location using the existing screws under the center console trim. Since the ashtray mounts aren't centered beneath the trim, you'll need to cut a small radius opening in the trim for both the cup and coin holder in order to fully utilize them. The lighter plug can be conveniently relocated during this process.
You might be tempted to locate the cup holder first (right behind the hazard light switch) followed by the coin holder but be careful: there isn't enough clearance under the console for the deep cup holder to be placed first in line. The orientation of the coin holder (facing rear) makes it easy to use since it faces away from the up-sloping hazard light switch, and the adjoining flat surface atop the cup holder can be used to slide coins.
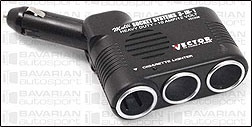
UPDATE: A variation of this procedure would be to install a 3-way power port outlet in place of the coin holder. This part may be purchased from Bavarian Autosport. See image above. Some modification of the procedure below will be necessary.
Procedure
1) Remove two phillips screws from bottom of center cubby and also from underneath ashtray (if any). Remove center console trim after removing hazard light switch and disconnecting lighter plug.
2) Move center trim to work bench. Invert. Remove the four phillips screws that hold the ashtray to the trim.
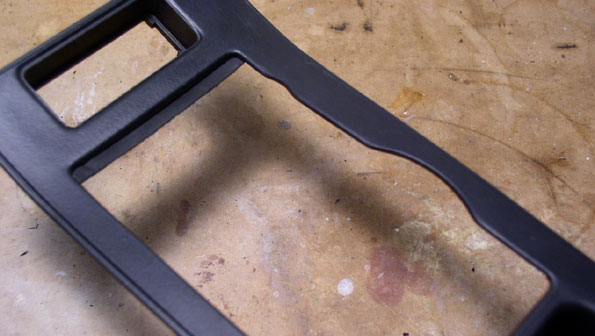
3) Remove metal tray, lighter, and lid from ashtray. Using a fine-toothed blade on a sabre saw or other cutting tool, cut away the ashtray housing from its frame leaving approximately 1 inch of the upper frame intact. Carefully visualize your cut line in advance. Use a marker pencil if necessary. The resulting piece should look like the image below:
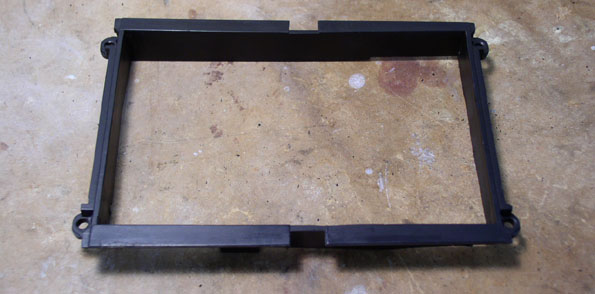
4) Using fine grit sandpaper, clean up the frame piece. Inspect.
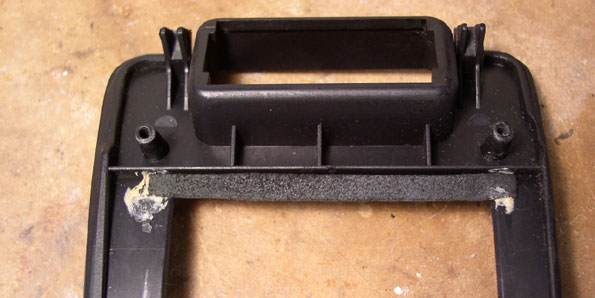
5) Secure the newly cut frame back onto the center trim. Locate cup holder at the rear position of the frame. Fit it flush with bottom of center trim and note its location. Using a punch tool, mark 4 points on the frame (2 on each side) just inside the cup holder corners.
6) Remove frame from trim. Working with just the frame - and with cup holder in its final position, use a hand drill to make 4 small pilot holes in the marked locations, thru the frame and into the cup holder. Secure with 4 small, approx 1/2" flathead screws. Inspect. See image below.
7) Repeat steps 5 - 6 for coin holder. Mark 2 points (1 on each side) just inside the coin holder's corners. 4 screws may be used if desired. Be careful the screw length doesn't interfere with the round coin chambers.
The result should look like image below. Note screw locations:
8) Using a strip of leather or other suitable material (I used spare material from the rear of the center cubby), cut a 1/4" strip to approximately the same width as the center trim console. Using construction adhesive or other glue, adhere it to the underside at the front of the center trim. See image below. This will be used to cover the remaining 1/4" gap between the coin holder and front edge of center trim.
9) (Optional) Since the ashtray frame is not centered below the trim, the cup/coin holder will be slightly offset to the right. This means the trim interferes slightly with both the cup and coin holder openings. To resolve this problem, do the following:
Temporarily install cup/coin holder assembly back into center trim console. With a marker tool, draw an appropriate radius line to the right of both the cup and coin holder. Remove cup/coin holder. Using a radius file (or cutting tool), remove the plastic material. Then use fine grit sandpaper to finish. See image below:
10) The deep cup holder won't fit back into the center console area without a few minor modifications. Specifically, the raised rectangular ashtray attachment point needs to be removed, and additional room is needed for the cup holder's outer frame. These points are illustrated in the "after" picture below.
Before:
After:
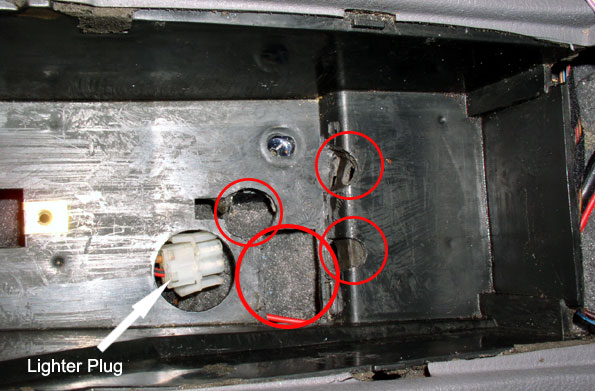
Using a cutting tool, cut away the areas circled in red above. I used a cutting/gouging bit on my hand drill, as shown below.
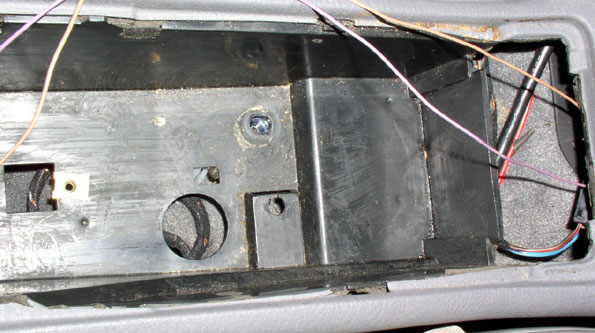
If you use the cigarette lighter plug as a power source, it may be conveniently relocated at this time. For example: thread the wire to the rear of the center cubby, or even to the rear utility bins. You could remove the lighter from the ashtray or, snip off the lighter wires after the plug to use a "hard wire" setup.
Dry fit the center trim with cup/coin holder assembly in place. Check clearances. Fine tune cut-outs if necessary with a small file. Clean. Check new lighter plug location for accessibility if applicable.
11) Verify clearances and fit & finish, then install center trim with new cup/coin holder and enjoy!